Welding can offer you a good chance to build successful career as well as satisfaction to build something. If you do not wish to seek this as a profession then also it can get you the habit of fixing some technical devices used at home. In short welding is a helpful process which can come handy in professional level, as a hobby or as an in-home technician.
The thing you require to start practicing welding is not only the tool kit, helmet, gloves and other equipments, but the skill and patience. This is a rather delicate form of execution art and it can provide you with the scope to learn more and in bigger scale if you wish to prosper.
Getting Started in Welding
Learning welding skill does not mean that you will be laying a perfect welding bead in the first instance. Along with patience and skill you need the tool kit. The popular welding kits which are at the top of the list often come at such high price, that you may feel intimidated. But to save the beginners from this trouble there are certain welding tools available in the market which is great for the entry level welders and also these can be used commercially. However, they come for a much lower price. A few hundred dollars are enough to provide you with a set of welding tool kit.
The roundabout budget for the complete set of tools comes at or around $500 and it will include safety equipments as well as other tools. The tool kit will allow you to weld mild steel of ¼ inch thickness. After you get enough experience, you can weld cart or shell with a more updated and pricier tool kit.
Now how to get started with welding, this is a step by step procedure for you:
Choosing welding process-
There are various welding processes as one method does not work for all purposes. The factors that matter with every different kind of welding jobs are
- The thickness along with the type and size of metal
- How elaborate the welding job will be
- The process will take place outdoor or indoor
- How the finished welded product will look like
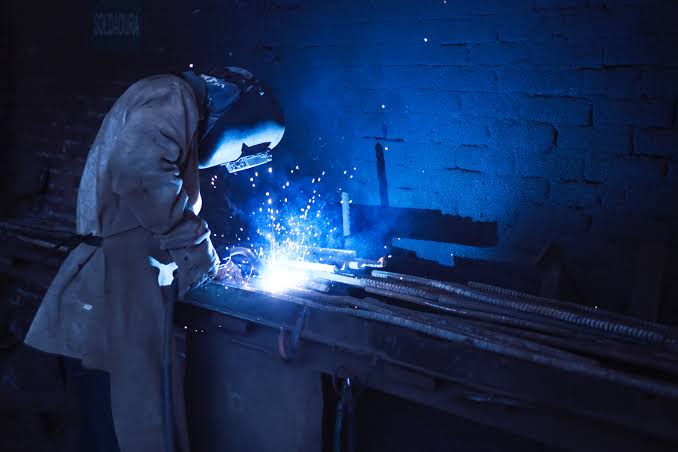
Keeping in mind all these factors, US people prefer arc welding more than any other processes. A welding wire or any other electrode is used to melt the base metal partially and other metal part is fused with this one.
For whom learning welding is a self taught process, MIG welding is done best by them. This process works by wire feeding and all you have to do is pulling the trigger of welding gun and the wire itself will spin out at a continuous speed. However, when the job is intricate and extensive, multiple disciplines are needed. So choose wisely depending upon which job you want to perform.
Buying the welder
Do not go over-budget if you are a beginner at welding. You can get cheap welders at $100 but then it will be difficult to manage the tool while you will learn new skill. It is advised to get motor-driven wire spool. This helps to create perfect bead by the arc from contacting the wire. For the growing skill of next level you can get multi-function welder which allows you to do MIG, TIG and stick weld but the price may be a steeper $1000 for this set.
But if you buy this set at once, it will be a cost saving affair for a long time.
Buying welding accessories–
get a good supply to welding wire, which is a must for welding job.
- Begin with thin welding wire on thin sheet and then increase the diameter of welding wire based upon the thickness of metal. You can get a flip up panel on the welder if you are a beginner.
- Also you need the right shielding gas. Your local welding supplier can get you the reusable gas tanks. You also need a PSI of 15-25, but if you wish to get a clean weld, then 75/25 mixture of carbon dioxide and argon will help.
- For wire feed welder you need a welding cart, get one arc welding cart with tank storage.
- A carbide scriber will help you to mark lines on the metal that will be fused together.
- A right angle grinder will help you to flatten the welds and prepare the surface.
- A miter clamp or magnet square helps you to secure the joints.
- A chipping hammer is needed to get away with the slag.
Welding pliers are needed to trim the welding wire and remove the splatter.
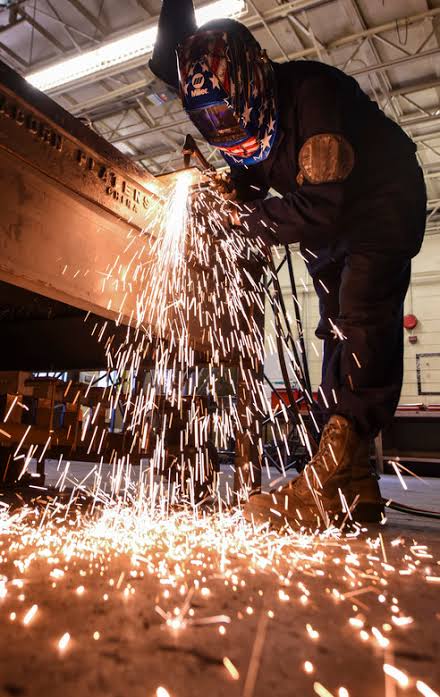
Buying welding helmet–
The arc welding light, the flying sparks and risk of any mishap while doing the welding can be get rid of only with a good welding helmet. A cheap basic flip helmet can serve you the purpose but if you are a regular welder, then it is best to buy an auto-darkening helmet to get rid of the risk of arc welding. The viewing glass of this helmet is usually incorporated with LCD technology and it darkens the viewing part by sensing the presence of UV and IR.
Prepare to begin the welding-
get your welding jackets on as the metals you have stacked are potent to get a fire started. Put your leather welding gloves and helmet on. Also wear your welding boots as the regular sneakers are not good enough to support you through the molten metal that may come in contact with your body. If you will be grinding, then wear a pair of safety glass to save the full face.
Get the weld prepared–
Welding process needs a minimal level of preparation.
- Remove the oil and dirt from the metals that you meant to weld, use acetone with wire brush to do the job.
- Then add the cut lines with carbide scribe on the metals and finish it by using plasma torch or cut-off wheel.
- Grind the edges that you intent to join. If possible make a 45 degree angle on the edges so the filler materials get some space. Your joint and bead will get a more structured integrity.
- Then position the metal on the same plane by help of miter clamp or magnet square.
Get yourself prepared –
the tips we are providing here are meant to make your welding experience more comfortable and safe.
- Hold the welding gun with two hands to get some extra stability. Do a dry run beforehand to ensure that you are attaining the best position and posture.
- Keep the weld items in track.
- Keep the gun at 75 degree angle to the base metal and then after gun is shot, take the gun back in slow reverse direction.
- Lay down your bead from right to left if you are left handed and do the reverse if you are right handed.
- Don’t be intimidated by the bright arc light as the quality of bead will become poor, rather focus on the edge of the pool which will create the bead.
Some more tips –
If you are a perfectionist and wish your welding to look better then these tips are for you.
After the weld is cooled, flush grind it. Use 36 grit wheel on the right angle grinder for this job. But do not overdo it as that may go through the weld and you have to begin all over.
Different coloured sparks say different things about your welding, orange sparks say that your pressure at right angle grinder is just right, while blue spark says your pressure is too much so you should put less pressure now. White sparks means the heat is excessive and thus it can worsen the structure of the weld. Stop and check if something already has been damaged.